After reaching the Inprotect page within the NST WUI, one will find that several other services need to be setup and started before we can start the Inprotect service.
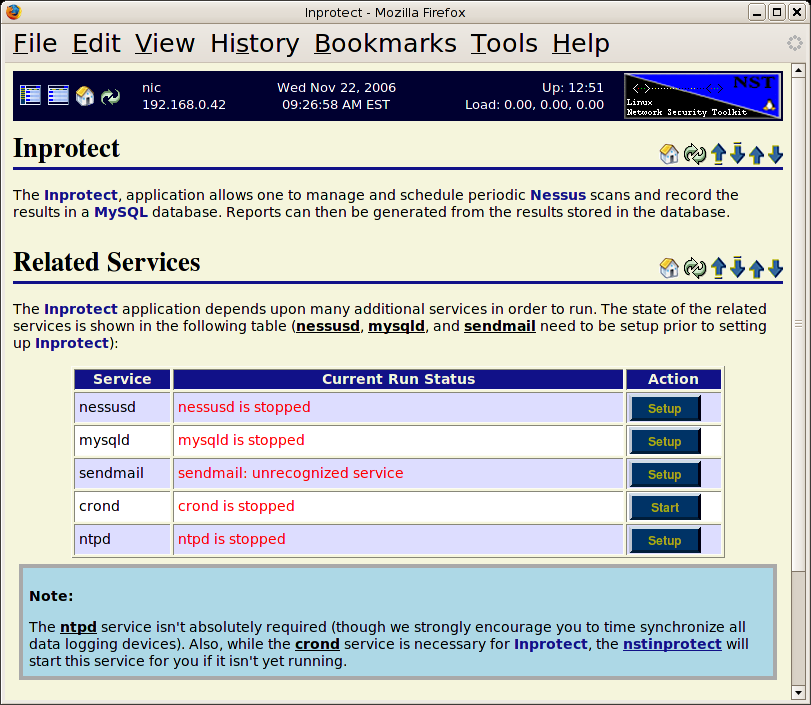
Reading carefully, we'll see that at a minimum we need to setup nessusd, mysqld and sendmail. We'll begin this minimal setup by selecting the button for the nessusd service which will take us to the following page:
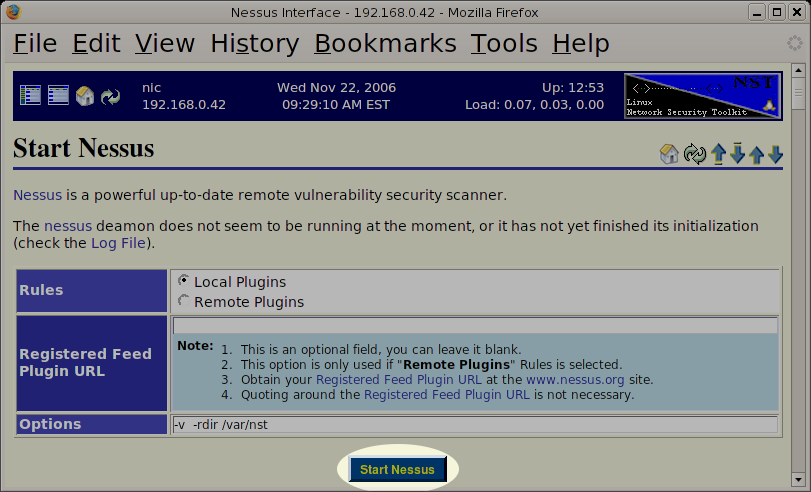
For this example, we will simply press the button to setup and start the nessusd service using the default settings.
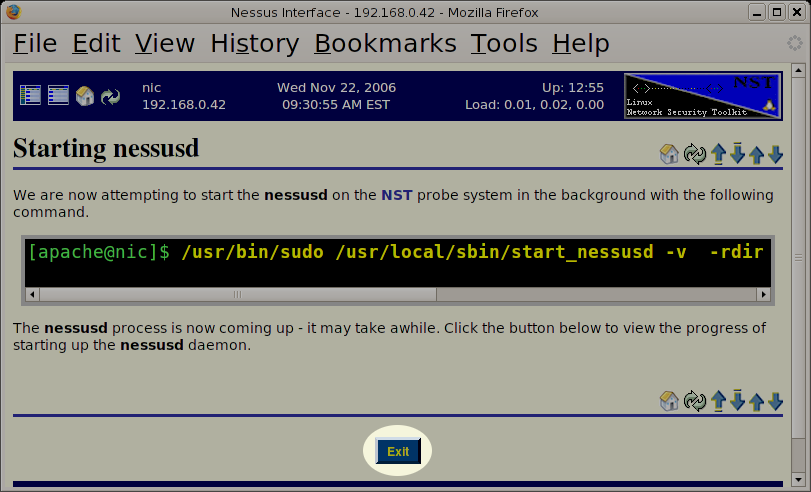
Carefully reading the above output, we will notice that the starting of the nessusd service may take awhile. We will then press the button. Once the nessusd service has finished its initialization process, we will see the following:
Note
If you don't see the page above immediately, don't panic. Read what appears in your browser, most likely it will tell you that nessusd is still in the process of starting and give you information on how to refresh the page as you wait for the startup process to complete.
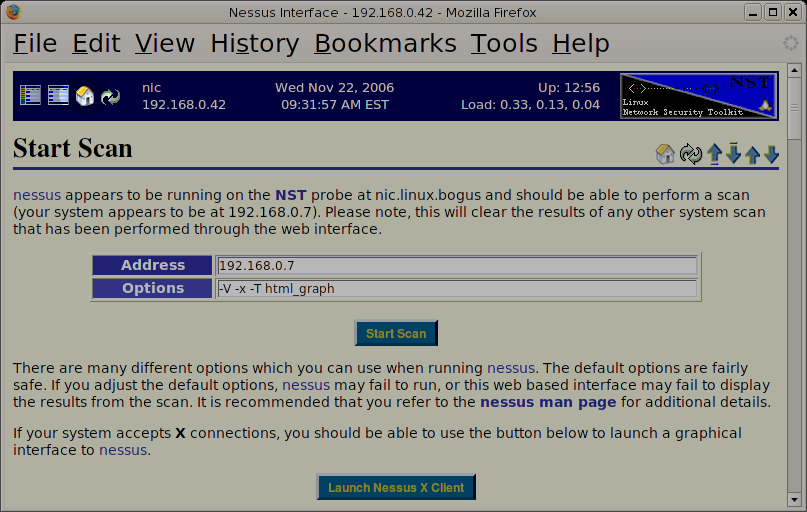
Now that nessus is setup and running, we'll select the "Home" icon on the top navigation bar to return to the main index page. From there, we'll go back to the Inprotect page as described in the "Finding Inprotect in the NST WUI" section.